

Installation
Initial Setup
If you have downloaded this program by modem, run the self-extracting executable in a temporary directory to extract the installation files.
Select the 16 bit ODBC Driver disks if you are using Windows 3.11 or Windows for Workgroups. If you are using Windows 95 or Windows NT, you should select the 32 bit ODBC Driver disks.
Don't forget to read the "Read Me" file during installation for the latest information on Flex/ODBC setup and other information.
Unload Microsoft Office toolbar from memory if you using MS Office 4.x or Office 95 and any other Windows applications that can impair installation. Run the Install program from within Windows to install the driver.
1.File / Run from the Program Manager for Windows 3.11 or Windows for Workgroups or Start / Run for Windows 95 or Windows NT.
2.Type in "a:odbc16.exe" if you using Windows 3.11 or Windows for Workgroups, or "a:odbc32.exe" if you are using Windows 95 or Windows NT.
3.Click "OK" and follow the on screen prompts.
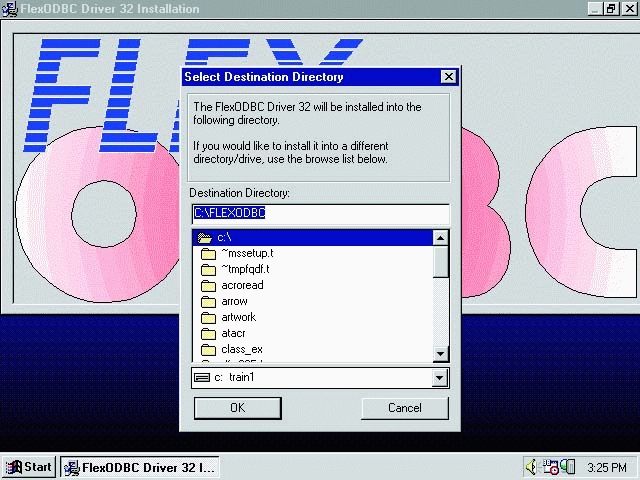
Select Destination Directory
Select the destination directory to install the Flex/ODBC sample data and support files. Click "OK" to continue. The "Add to Start Menu?" screen appears.
You should Click " Yes " to add shortcuts (icons) for Flex/ODBC to your desktop. This will allow easy access to ODBC setup and the Flex/ODBC utilities.
Add to Start Menu?
Registration Information
1.If you have obtained a registration name and code for your product, type in the
registration name and code, otherwise leave these blank. Please note that you have to enter 4 in the "User Count" box if you have purchased a 4 CPU User Count license or leave it blank if you have a Single or Multi-User license.
2.Click "OK".
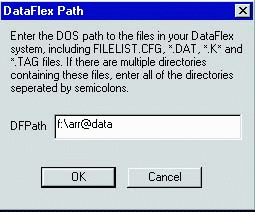
DataFlex Path
Enter the directories where your DataFlex application data files are located, or leave as a "." to automatically select your DOS DFPATH setting in your "AUTOEXEC.BAT" file. Click "OK" to continue. The Flex/ODBC installation process is now complete!
Configuring Your Own Flex/ODBC Data Source
Following the successful installation of Flex/ODBC, you should configure your own Data Source Names (DSN) for the various DataFlex applications or directories you might have. For example you might want to set up a separate Data Source Name for each company of a multi-company DataFlex Accounting System. Click to continue and choose "Add" and select "DataFlex Driver". The Flex/ODBC Setup screen appears (see notes on the next page).

Adding your Data Source Names (DSNs)
INSTALLATION NOTES:
1.The Data Name is a display name for your DataFlex data (Arrow, DataFlex Data, DataFlex) and the DFPATH is the directory path name to your DataFlex FILELIST.CFG, *.DAT, *.K and *.TAG files. This entry can accept multiple directory names separated by a semicolon (;). You should, however, keep in mind that some applications may not handle multiple paths. Should this occur you should reorganize your data files to reside in one directory path.
If you already have a DFPath environment variable defined: You can leave this entry as "." (current DFPath). Please note that your .TAG files should be in the same directory as your DataFlex .DAT files.
2.The Trace File is left blank unless you want to trace driver operations to an ASCII text file. If you wish to trace, fill in the name of an ASCII filename here.
3.The Display RECORD_NUMBER checkbox is normally checked so that the physical position number of the record in the file appears in the query as data. If you want it removed, uncheck this option.
4.The Read Only checkbox is checked if you don't want the application to be able to modify DataFlex files.
5.The Date Support checkbox is set to the number of year digits your DataFlex application uses. Set this value to the length of the year when dates are shown by DataFlex applications, either 4 or 2 digits.
6.The Registration name, code and users are entered from the values shown on registration card or certificate. If you are evaluating the program, these values are left blank.
7.Please note that you have to enter 4 in the Users space if you have purchased a 4 CPU license or leave it as 0 if you have a single or multi-user license.
8.We recommend you setup an individual Data Source Name defined for each application you are running to make access easier.
9.Any number of Data Sources can be added to any application you are running at any time. To add multiple DataFlex data sources (multiple filelists), choose "Add" to choose additional DSNs.
Operation & Registration
You are now ready to access DataFlex data from any ODBC application. The Data Name you defined should show up on the list of SQL data sources in ODBC applications.
Demo Limitations:
If this product is unregistered, it is limited to 50 records searched per query in demo mode. If a query returns no result, it may be that no match was found within the first 50 records searched. The sign-on message when connecting to the driver will also appear every time you connect. Registered versions show this message only once per Windows session.
Registration codes can be obtained by contacting your local dealer of DataFlex products. The registration code is case sensitive and always 8 characters long. The first character designates a S ingle, U ser Counted or a M ulti-user license.
Testing Driver Installation
This driver is not guaranteed to work with all possible front-end ODBC applications and it would be impossible to test them all. If you find you have problems with this driver that do not occur in other ODBC drivers, contact your place of purchase. We do want to provide maximum compatibility wherever possible.
Simple C++ and Visual Basic test programs have been included in this product to allow basic testing and to isolate problems from various environments. Once loaded, opening or adding a new connection should produce a list of your Data Source Names (DSNs). Select your Data Name and enter "SELECT * FROM FLEXERRS". This should show records of data from the standard DataFlex Error file.
We have also included a sample set of data files and a sample Word Basic program for your review.
Each evaluation edition of the Flex/ODBC driver has an expiration date, beyond which it will fail. This does not affect registered users. Should your evaluation copy expire, you can use the internet to download another full evaluation copy for free at http://www.flexquarters.com .
(c) FLEXquarters